October 16, 2012

Cheddar Garlic Buttermilk Biscuits (Just like Red Lobster!)

I've been looking for years for a recipe that mimics the delicious cheesy biscuits at Red Lobster, and I've finally found one! Of all places I ended up stumbling upon this recipe on the back of my bag of flour. Who would have thought? I've been making this tomato soup lately, and these biscuits are the perfect complement. Aside from being easy to make, the recipe makes a bunch of biscuits, and they're just as good warmed up in the oven.

There are only a few ingredients that you'll need. (Sugar not shown.)

This recipe calls for self-rising flour. If you don't have self-rising flour or prefer not to use it simply add 1 1/2 tsp baking powder and 1/2 tsp salt for each cup of all-purpose flour used. Mix flour, garlic powder, parsley, sugar, and shredded cheddar.
Add cubes of butter.

Cut in butter cubes with a pastry blender, fork, or your fingers until the mixture is crumbly.


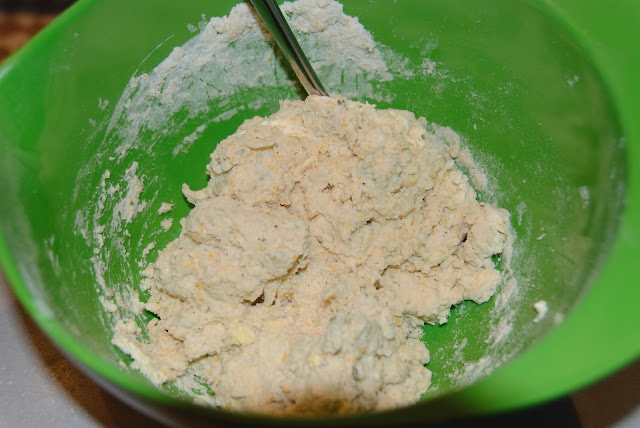
Stir in buttermilk. (If you don't have buttermilk or run out, you can easily substitute in regular milk or even whipping cream.) Add additional tablespoons of milk as needed if mixture is dry.

Drop spoonfuls of the mixture onto a silicone-lined, or a plain ungreased, baking sheet. I typically get between 14-17 biscuits depending on how I'm feeling and how large I make each biscuit.


Bake at 450º for 12-14 minutes or until tops are browned.
Brush with melted butter if desired and enjoy!

Cheddar Garlic Buttermilk Biscuits (Just like Red Lobster!) 
2 1/2 cups self-rising flour
2 tsp sugar
1/2 cup butter (1 stick), cold and cubed
1 cup buttermilk
3/4 cup cheddar, shredded
1 tsp garlic powder
2 tsp parsley, dried
2 Tbsp butter, melted (for brushing on top after cooking)

1. Heat oven to 450º.
2. Mix together flour, sugar, garlic powder, parsley, and shredded cheddar.
3. Cut in butter cubed until flour mixture is crumbly.
4. Add buttermilk and stir until combined. Add additional milk as needed if mixture is too dry.
5. Drop large spoonfuls of dough onto a silicon-lined (or plain, ungreased) baking sheet.
6. Bake 12-14 minutes until tops are brown.
7. Brush with melted butter.
8. ENJOY!

October 13, 2012

A Late Night Laugh

This describes my life perfectly. I showed it to Lars and he nearly died from laughing so hard because he knows that this is all I can talk about each time I return from the store. Hope it makes you smile too. Have a great rest of the weekend!


September 30, 2012

Home Offices

I'm someone who is constantly on the lookout for fabulous home design ideas for the house Lars and I will build someday. Mind you, I'll be toting around my ideas for the next decade or so, but it's never to early to look. Don't you agree? One thing that we know we both want is a functional home office. We're lucky enough to have a two bedroom place right now, and we've completely converted the extra room into an office that works for us. I went looking for office inspiration today, and I found some great ideas to stash away.

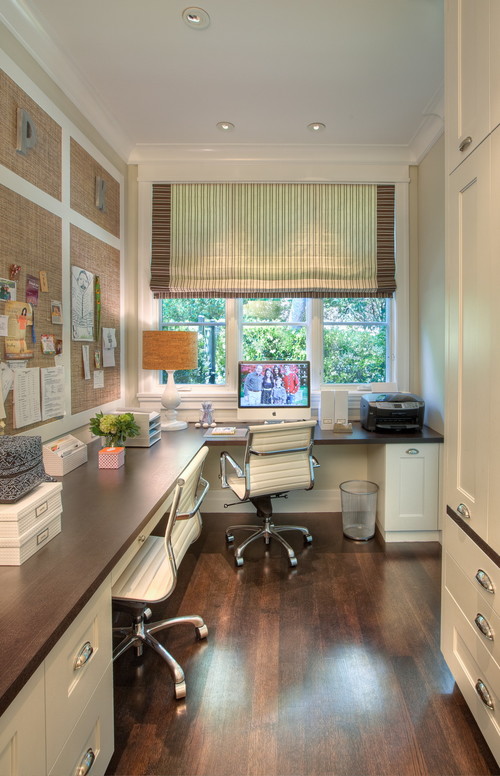
I like the brightness and natural look of this office with the window and the cork boards on the wall.

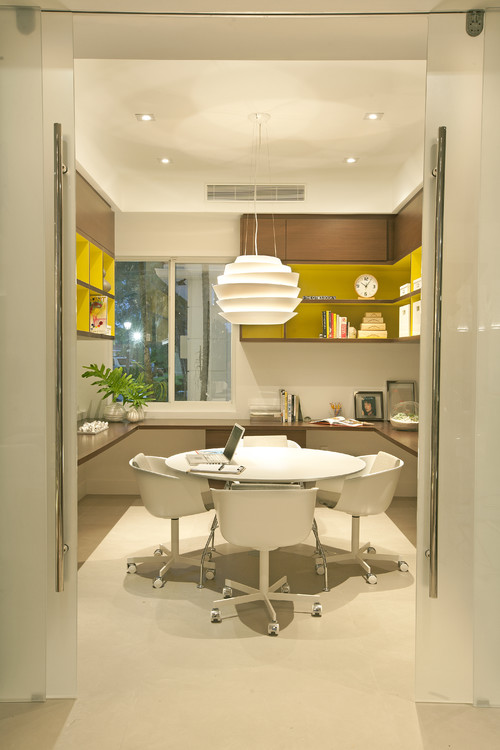
The style of this office isn't what I would normally choose; however, I really like the idea of being able to spread my work out on a table and not just work at a desk all the time.

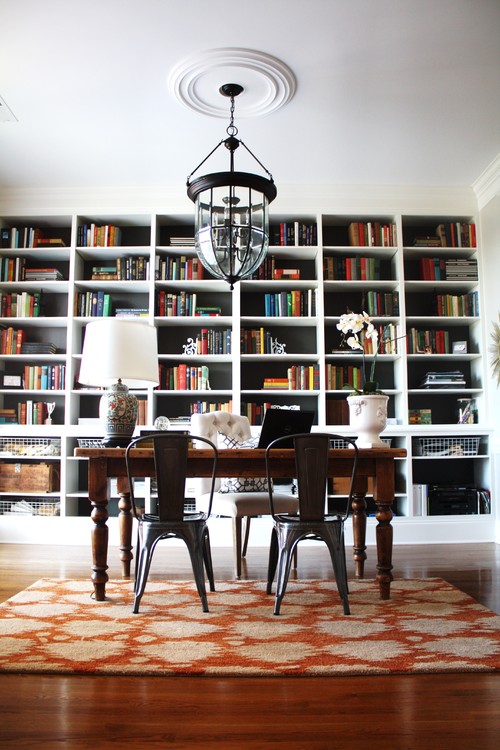
Office spaces usually mean there are books present somewhere, so we know that it's a room I'm always going to love. This office is a great combination of both work functionality and a library. All it needs is a funky filing cabinet somewhere, and it would be perfect!

                                          Eclectic Home Office design by Charlotte Interior Designer Emily A. Clark

September 24, 2012

Caramelized Onion Quiche

A while back we had an abundance of onions in our CSA basket so I had to figure out something to do with them. I ran across a recipe for a quiche that I have since adapted to fit our tastes, and it's definitely a keeper recipe in our house. Oddly enough, Lars isn't a big fan of onions, and I'm not a big fan of eggs, but we both could eat this quiche weekly. It's great right out of the oven and may be even better warmed up the next day - the jury's still out on that one. Although caramelizing the onions is a bit time consuming, it recipe itself is super easy and fairly fool proof.

I use one large Vidalia (or other sweet variety) onion, but you can use your favorite type of onion as well as an additional onion depending on your tastes.

I cut the onion into quarters and then slice it thinly to make the caramelization go a bit quicker.

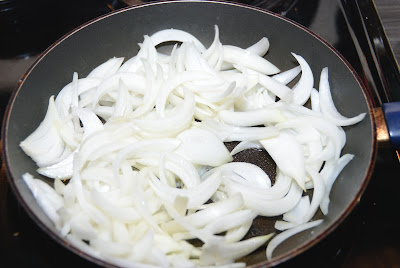
Once you've cut up the whole onion, put the slices in a large heated saucepan with the olive oil.

Cook over medium heat for ten minutes until onions are soft, mostly translucent, and starting to brown.

Turn the heat down to medium low and cook approximately 40 more minutes. This is a good time to bake the pie crust, grate the gruyère, and mix together the eggs, milk, and cream. (I use a Pillsbury refrigerated pie crust because it's easy and saves time. The gruyère cheese goes so incredibly well with the eggs that I have never tried to substitute any other type of cheese, although I'm sure it can be done. I buy the gruyère in thick, grate-able slices at the deli counter because it's much cheaper than buying it packaged or pre-shredded.) After the 40 minutes the onions will be close to caramelized.

Add the balsamic vinegar to complete the caramelization process and cook about 10 minutes longer.

Once the crust is cooked and mostly cooled, place half of the grated cheese on the bottom of the crust. Place the onions over the cheese and sprinkle the remaining cheese over the onions.

Pour the egg mixture to top of the cheese.


Bake the quiche in a 350° oven for 30-35 minutes or until it is set in the middle. I like to brown the top of the quiche a bit more than it usually is once it's set, so I broil it for a few extra minutes. If you choose to do this be very careful and make sure to watch the quiche. The last thing you want is a burnt quiche after all the time it took to prepare.

Let the quiche cool for 10-15 minutes then cut, serve, and enjoy!

(On a side note, this quiche is delicious as leftovers if you manage to have any. Simply reheat it in the oven for the best results.)

Caramelized Onion Quiche:
Makes 4-6 servings

1 pie crust (use favorite store bought variety or make your own)
2 Tbsp olive oil
1 large onion (use favorite onion variety)
1 Tbsp balsamic vinegar
3 large eggs
1/2 cup milk
1/2 cup heavy cream
4 ounces Gruyère cheese (~1 cup grated)
Pinch of salt and pepper

1. Bake pie crust according to package or recipe instructions and let cool. Preheat oven to 350° for quiche.
2. Peel onion and slice thinly.
3. Place onion in pan with olive oil over medium heat and sprinkle with salt. Cook 10 minutes stirring often.
4. Turn heat to medium low and cook onions 40 minutes stirring often.
5. Add balsamic vinegar. Cook onions 10 minutes. Remove from heat.
6. Place half of shredded cheese on bottom of baked pie crust. Top with onions and cover with remaining cheese.
7. Whisk together eggs, milk, cream, and a pinch of salt and pepper. Pour mixture over cheese and onions.
8. Bake 30-35 minutes or until the middle of the quiche is set.
9. Cool 10-15 minutes, slice, and serve.
10. ENJOY!